Pin it
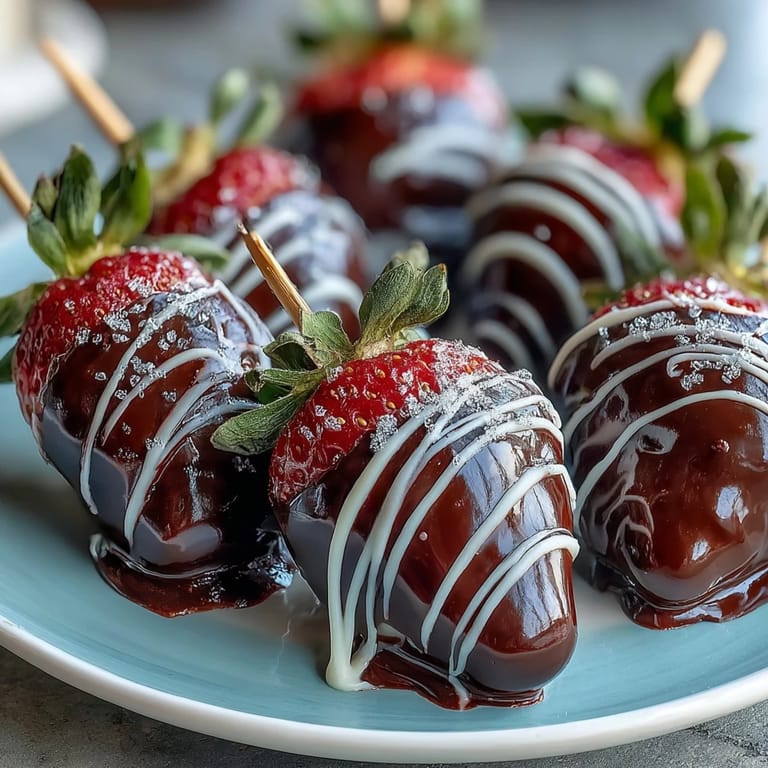
 My sister called me in a panic two days before Valentine's Day, insisting she needed something 'show-stopping but not complicated' for her new boyfriend. I suggested chocolate-covered strawberries, and she laughed—too basic, she said. But then I described arranging them into an actual bouquet, securing them with ribbon, wrapping the whole thing in tissue paper like a gift. Her silence told me she got it. When he opened that box and saw the elegant cluster of glossy, jewel-toned berries nestled in crinkled paper, his face lit up in a way that made me realize this simple idea had somehow become magic.
I made these once for a dinner party where I was running late, and honestly, that stress turned into an unexpected advantage. Instead of overthinking the arrangement, I just grabbed the skewered berries straight from the fridge, wrapped them quickly in some nice tissue, and handed them over as a centerpiece. My host set them down in the middle of the table, and guests were picking them up throughout dinner like they were edible jewelry. Someone asked if I'd ordered them from a fancy chocolatier, and I had to laugh—nope, just strawberries, chocolate, and about twenty minutes.
Ingredients
- Fresh strawberries (12 large, stems on): The stems aren't just for looks—they're your handle for dipping and what makes this feel like a real bouquet instead of a dessert plate. Pick berries that are ripe but still firm, because soft ones collapse when you skewer them.
- Semisweet or dark chocolate (120 g): This is your main coating, and honestly, the quality matters more than you'd think. Cheap chocolate can taste waxy, so grab something you'd actually enjoy eating on its own.
- White chocolate (60 g, optional): I use this for drizzling because it adds visual contrast and a touch of elegance without being required.
- Chopped nuts, shredded coconut, or edible glitter: These are your personality layers—pick what speaks to you, or mix and match across different berries so each one feels unique.
- Wooden skewers (12): These become the stems of your bouquet, so choose ones that feel sturdy and won't bend when you're handling them.
- Floral tape or ribbon: This binds everything together at the end and actually holds the bouquet shape so it doesn't collapse when someone picks it up.
- Tissue paper or cellophane for wrapping: The wrapping transforms this from homemade to heirloom-gift-worthy, so don't skip this step.
Tired of Takeout? 🥡
Get 10 meals you can make faster than delivery arrives. Seriously.
One email. No spam. Unsubscribe anytime.
Instructions
- Prep your strawberries:
- Wash and dry them thoroughly—any water left on the surface will make the chocolate slide right off instead of sticking. I pat mine with paper towels twice to be absolutely sure they're dry.
- Skewer each strawberry:
- Push the wooden skewer gently into the stem end, just far enough that it holds steady without splitting the berry. This becomes the handle, so make sure it's secure.
- Melt the chocolate:
- Use a heatproof bowl over simmering water (the steam does the work without burning anything), or do it in the microwave in 20-second bursts, stirring between each burst until it's smooth and glossy. Either way, you're looking for chocolate that's warm and pourable, not hot.
- Dip with confidence:
- Hold the skewer and swirl each strawberry into the melted chocolate, letting the excess drip off before placing it on your parchment-lined baking sheet. The swirling motion ensures an even coat without it being too thick.
- Decorate while chocolate is still wet:
- If you're using nuts, coconut, or sprinkles, add them right away while the chocolate is tacky enough to hold them. Wait too long and they'll just slide off.
- Optional white chocolate drizzle:
- Melt the white chocolate separately and use a fork or small spoon to drizzle it over the dark chocolate coating in decorative lines. It sets quickly and looks intentional.
- Chill until set:
- Refrigerate for at least 15 minutes—you want the chocolate firm enough that it doesn't stick to fingers or slide around when you handle it. I usually do this while I'm gathering my wrapping supplies.
- Arrange into a bouquet:
- Gather all the skewered berries together in a pleasing arrangement, like you're holding a bunch of flowers. Wrap the skewer stems tightly with floral tape or tie them together with ribbon, making sure nothing shifts when you pick it up.
- Wrap and present:
- Crinkle tissue paper around the base to cradle the bouquet and hide the tape, securing it with a ribbon or bow. This is where it stops looking homemade and starts looking like you ordered it from somewhere very expensive.
 Pin it
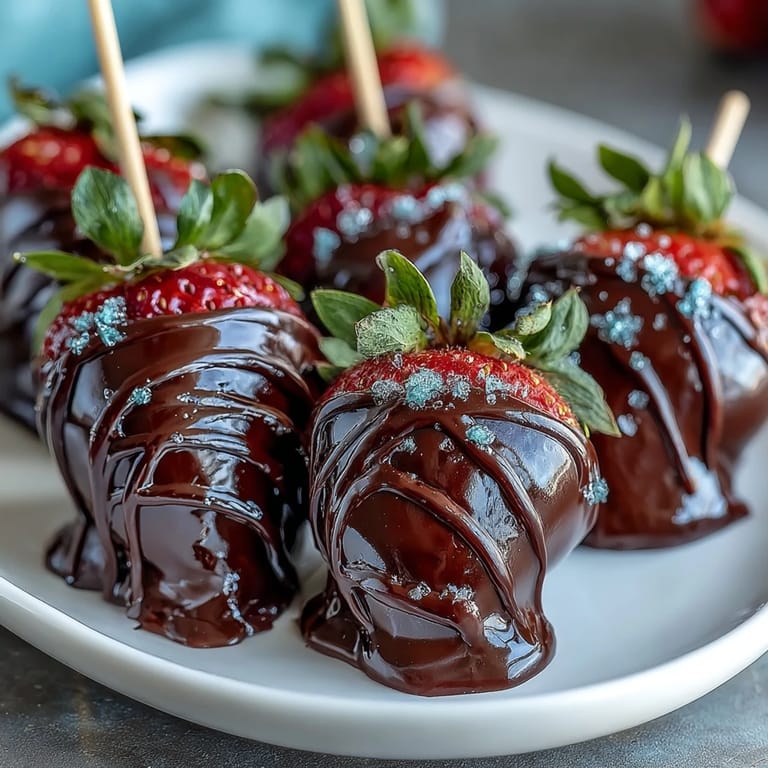
 There's a moment when you pull the bouquet out of the fridge, see how the chocolate has set into a glossy shell, and suddenly realize you've created something genuinely beautiful. It's not just a dessert anymore—it's a small work of edible art. When someone holds it carefully and says 'This is almost too pretty to eat,' you know you've nailed it.
Chocolate Temperature Matters More Than You Think
I used to think any melted chocolate was fine as long as it covered the strawberry. Then a friend pointed out that overheated chocolate develops a grainy, dull finish instead of that silky shine that makes these look fancy. Now I use the water bath method most of the time because it's harder to overheat—the steam does the work without direct heat. If you're microwaving, those 20-second bursts really do make a difference. Rushed chocolate and beautiful berries don't make a good pairing.
Timing Is Your Secret Weapon
You can make these a few hours ahead and keep them in the fridge, which is honestly perfect for last-minute gifting. Pull them out about 30 minutes before serving so the chocolate softens slightly and the strawberry flavor comes through—room temperature is when they really taste like themselves, not just 'chocolate-covered fruit.' That said, if someone's eating one straight from the fridge, the firmer chocolate gives you cleaner bites, so there's no wrong answer here.
Dress Them Up to Match the Moment
I've made these for Valentine's Day with dark chocolate and red glitter, for a friend's engagement party with white chocolate and pearl sprinkles, and even for a casual Friday night with nuts because that's what felt right. The beauty of this recipe is that the toppings let you make it yours. You can keep everything matching for a polished look, or go wild with different decorations on each berry so it feels playful and personal.
- Crushed pistachios add a pop of color and a subtle salty edge that balances the sweetness.
- A light dusting of coconut makes them tropical-adjacent and gives you that textural contrast between chocolate and fruit.
- Edible glitter or heart-shaped sprinkles are purely visual, but sometimes the presentation is half the gift.
 Pin it
 This recipe proves that the most memorable gifts don't have to be complicated—they just have to feel intentional and taste delicious. Hand someone a chocolate-covered strawberry bouquet and watch their whole face change.
Recipe Questions & Answers
- → What type of chocolate works best for coating the strawberries?
Semisweet or dark chocolate provides a rich flavor and smooth coating that sets well on strawberries. White chocolate can be used for decorative drizzling.
- → How do I ensure the chocolate coating sets properly?
After dipping, chill the strawberries in the refrigerator for at least 15 minutes to allow the chocolate to harden and hold its shape.
- → Can I add toppings to the chocolate before it sets?
Yes, sprinkle chopped nuts, shredded coconut, or edible glitter immediately after dipping for added texture and visual appeal.
- → What’s the best way to assemble the strawberries into a bouquet?
Insert wooden skewers into each strawberry’s stem end, arrange the skewers into a bouquet shape, and secure the stems together with floral tape or ribbon. Wrap the base for a polished look.
- → How should the bouquet be stored before serving?
Store the assembled bouquet in the refrigerator to keep the chocolate firm but bring it to room temperature before serving for optimal flavor.